
Beginner Cricket Kit Checklist: Everything You Need Before Your First Match
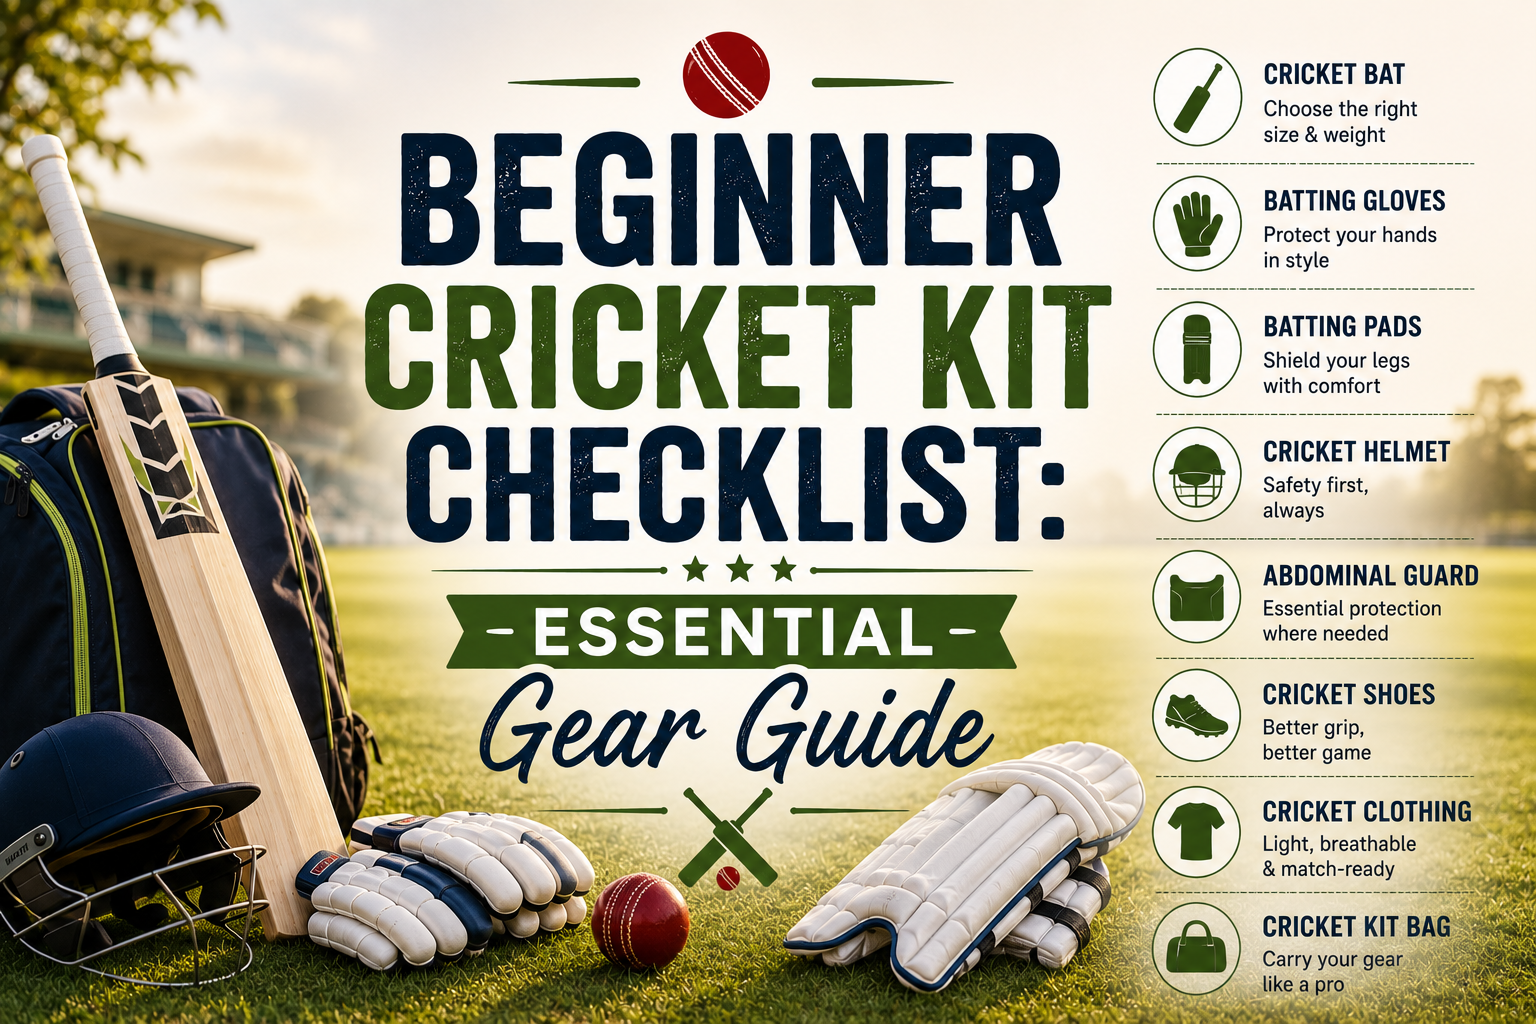
Starting cricket is exciting, but buying your first kit can quickly become confusing. There are bats, pads, gloves, helmets, shoes, thigh guards, arm guards, and plenty of other gear that may or may not be necessary for you.
The good news? You don’t need to buy everything at once.
A good beginner kit should give you the right balance of safety, comfort, fit, and basic performance. The most important thing is choosing equipment that matches your age, height, playing level, and the surface you actually play on.
This beginner cricket kit checklist breaks everything down so you can buy with confidence and avoid wasting money on gear you don’t need.
Key Takeaways
- Choose your cricket bat size based on your height and age, not just your age.
- Kids should use smaller bats that they can control comfortably.
- Adults normally use a Short Handle (SH) bat, but height and personal preference still matter.
- A cricket helmet is one of the most important safety items for batting and wicketkeeping.
- Batting pads should fit securely around your legs without restricting movement.
- Cricket gloves should feel snug without squeezing your fingers.
- Wear proper cricket shoes instead of ordinary running shoes when possible.
- Spiked shoes are useful on natural grass, while rubber-soled cricket shoes are often better for artificial or hard surfaces.
- Beginners don’t necessarily need every protective accessory available.
- Check the bat, gloves, pads, helmet, and shoes for proper fit before buying.
- If you’re playing organized matches, check your club or league rules before purchasing specialist equipment.
- Comfort and control are more important than buying the most expensive gear.
What Should Be in a Beginner Cricket Kit?
Let’s start with the basics.
A beginner’s cricket kit should cover three areas:
- Playing equipment
- Protective equipment
- Clothing and footwear
Here’s a simple breakdown of what you may need.
| Cricket Gear | Beginner Need | Why You Need It |
|---|---|---|
| Cricket bat | Essential | Used for batting |
| Batting gloves | Essential | Protect hands from the ball |
| Batting pads | Essential | Protect lower legs |
| Cricket helmet | Essential for most batters | Protects head and face |
| Abdominal protector | Essential for male players | Protects a sensitive area |
| Cricket shoes | Essential | Provides grip and stability |
| Cricket whites/clothing | Usually needed | Required for traditional cricket |
| Thigh guard | Recommended | Protects upper leg |
| Arm guard | Optional/recommended | Extra protection |
| Chest guard | Optional | Useful for extra protection |
| Wicketkeeping gloves | Only for wicketkeepers | Designed for catching behind stumps |
| Wicketkeeping pads | Only for wicketkeepers | Smaller, specialized leg protection |
| Kit bag | Recommended | Keeps everything together |
| Batting inner gloves | Recommended | Helps absorb sweat |
| Grip replacement | Useful | Maintains bat handle grip |
| Batting helmet grille | Part of helmet | Protects face |
You don’t have to purchase every item on this list if you’re just starting out.
For example, if you’re learning cricket as a casual batter, wicketkeeping gloves and pads make no sense unless you actually plan to keep wicket.
1. Choose the Right Cricket Bat
The bat is usually the first piece of cricket equipment beginners think about.
It’s also one of the easiest places to make a mistake.
A bat that’s too big or heavy can make it difficult to play proper shots. A smaller bat that you can control is usually much better for learning.
Cricket Bat Size Guide for Kids
When choosing a children’s cricket bat, use height as your main reference, with age as a helpful starting point.
The exact sizing can vary slightly between manufacturers, so always check the individual brand’s size chart before ordering.
| Bat Size | Approx. Player Age | Approx. Height |
|---|---|---|
| Size 1 | 4–5 years | 4’0″–4’3″ |
| Size 2 | 6–7 years | 4’3″–4’6″ |
| Size 3 | 8–9 years | 4’6″–4’9″ |
| Size 4 | 9–10 years | 4’9″–4’11” |
| Size 5 | 10–12 years | 4’11″–5’2″ |
| Size 6 | 12–13 years | 5’2″–5’4″ |
| Harrow | 13–14 years | 5’4″–5’7″ |
| Short Handle | Older teens/adults | Around 5’7″+ |
These are general guidelines, not strict rules.
Cricket Bat Size Guide Age: What Should Kids Use?
Age can help narrow down the options, but don’t choose a bat based on age alone.
For example, two 12-year-olds can have very different heights and strengths. One may be comfortable with a Size 6, while another may be ready for a Harrow bat.
The simplest test is control.
Have the player hold the bat in their normal batting stance. If the bat feels difficult to lift, swing, or control, it may be too large or heavy.
Don’t Buy a Bat That’s Too Heavy
This is one of the most common beginner mistakes.
A heavier bat isn’t automatically a better bat. If you struggle to move it quickly, your timing and technique can suffer.
For younger players especially, control should come before maximum weight.
2. Cricket Bat Size Guide for Adults
Most adult players use a Short Handle (SH) cricket bat.
However, adult doesn’t automatically mean every bat with a Short Handle will feel right.
Your height, strength, batting style, and personal preference all matter.
Cricket Bat Size Guide Adult
As a general starting point:
| Player | Common Bat Choice |
|---|---|
| Smaller adult player | Short Handle or smaller adult option |
| Average-height adult | Short Handle |
| Taller adult | Short Handle, with attention to bat dimensions |
| Teen around 5’4″–5’7″ | Harrow may be suitable |
| Teen around 5’7″+ | Short Handle may be suitable |
The important thing is to pick up the actual bat whenever possible.
Check whether you can comfortably get into your batting stance, move the bat through the shot, and control it without excessive effort.
If you’re buying online, compare the manufacturer’s listed bat dimensions and weight rather than choosing purely by the label.
3. Batting Gloves Are a Must
Cricket balls can travel quickly, even during beginner practice.
Your hands need protection, particularly around the fingers and knuckles.
A good pair of batting gloves should:
- Fit snugly around your hands
- Allow your fingers to move naturally
- Have adequate protection over the fingers
- Feel comfortable when gripping the bat
- Not slide around while you’re batting
- Allow you to close your hands around the handle
Should Cricket Gloves Be Tight?
They should be snug, not painfully tight.
If your fingers are pressed uncomfortably against the ends of the glove, try a larger size.
If the glove moves around significantly when you grip the bat, it’s probably too loose.
Try gripping a bat while wearing the gloves. That’s much more useful than judging the fit with your hands open.
4. Don’t Skip Batting Pads
Batting pads protect your shins, knees, and lower legs from the cricket ball.
For beginners, they can feel bulky at first. That’s normal.
The right pair should stay securely in place while allowing you to bend your knees and move between shots.
Look for:
- Comfortable leg fit
- Secure straps
- Adequate knee protection
- Padding that covers the front of your lower leg
- A design that doesn’t restrict your stance
How Should Batting Pads Fit?
The pad should sit centrally over your leg.
It shouldn’t constantly rotate sideways or slide down while you’re moving.
Put on both pads and take a few steps. Bend your knees into a batting stance and make a few practice movements.
If the pads feel like they’re fighting against your movement, try another size or model.
5. Buy a Proper Cricket Helmet
A helmet isn’t an optional fashion accessory.
If you’re facing a hard cricket ball, proper head protection is one of the most important parts of your kit.
A cricket helmet should fit securely around your head without being painfully tight.
It should also have a properly fitted face grille.
How to Check a Cricket Helmet
Before buying, check:
- The helmet sits securely on your head.
- It doesn’t move excessively when you shake your head.
- The grille doesn’t interfere with your normal vision.
- The chin strap can be adjusted correctly.
- There are no visible cracks or damage.
- The helmet meets the safety requirements applicable to your competition or cricket organization.
Don’t buy a second-hand helmet simply because it looks fine.
You may not know its complete history, and previous impacts can affect protective equipment.
6. Protect Yourself With an Abdominal Protector
An abdominal protector, commonly called a box, protects a sensitive area from the cricket ball.
For male players, it’s an important part of a complete batting safety setup.
Choose one that fits correctly and stays securely in place.
Don’t wait until you’ve been hit once to decide you need one.
If you’re buying one for a child, make sure the size is appropriate and that it is positioned correctly before play.
7. Consider a Thigh Guard
A thigh guard isn’t always essential for a casual beginner session, but it’s a useful addition once you’re regularly facing faster bowling.
It protects the upper leg and can reduce the impact from an unexpected delivery.
A basic beginner setup could include:
- Inner thigh protection
- Outer thigh protection
- Or a combined thigh guard
Choose whichever gives you comfortable coverage without restricting your movement.
8. Do You Need an Arm Guard or Chest Guard?
Not necessarily.
This is where beginners can easily overspend.
Arm guards and chest guards provide additional protection, but they’re not automatically required for every new player.
If you’re just learning in the nets or playing casual cricket, start with the essential protective equipment.
As you face faster bowling or play more competitive cricket, you can add extra protection based on your needs.
Your priority should be:
Helmet → pads → gloves → abdominal protection → additional protection
9. Choose Cricket Shoes for Your Playing Surface
Your shoes should match where you play.
This is an important part of your beginner cricket kit checklist because cricket isn’t played on just one type of surface.
You might play on:
- Natural grass
- Artificial turf
- Indoor cricket surfaces
- Hard or synthetic pitches
The best footwear can vary between them.
Cricket Shoes for Natural Grass
If you regularly play on natural grass, cricket shoes with suitable spikes can provide useful grip.
Spikes help your feet stay planted when batting, bowling, and running.
However, don’t assume you should wear spikes everywhere.
Cricket Shoes for Artificial or Hard Surfaces
For artificial wickets, indoor surfaces, and many hard surfaces, rubber-soled cricket shoes are often a more practical choice.
They provide grip without the same type of metal or specialized spikes used for some grass conditions.
Always check the rules and conditions at your cricket ground before choosing your footwear.
10. Don’t Use Running Shoes as a Permanent Replacement
You can sometimes see beginners wearing ordinary running shoes for cricket practice.
They’re better than playing in unsuitable casual footwear, but they aren’t designed specifically for cricket.
Cricket involves:
- Short sprints
- Sudden stops
- Side-to-side movement
- Batting stance changes
- Bowling run-ups
- Repeated movement on different surfaces
A proper cricket shoe can give you better support and grip for those movements.
If you’re only attending one casual session, you may not need to immediately spend a lot on specialist footwear.
But once you’re playing regularly, proper cricket shoes are a worthwhile upgrade.
11. What Clothing Do You Need for Cricket?
Your clothing depends on the type of cricket you’re playing.
For traditional longer-format cricket, you’ll generally need cricket whites.
For limited-overs, junior, club, or recreational cricket, the clothing requirements can vary.
A basic clothing setup may include:
- Cricket shirt
- Cricket trousers
- Cricket socks
- Appropriate underlayers
- Sweater or training top for cooler conditions
- Cap or sun protection where appropriate
Check your club’s dress code before buying a full set.
There’s little point buying traditional whites if your local league requires a colored playing kit.
12. Cricket Kit Bag: Don’t Forget Storage
Once you have your equipment, you need somewhere to put it.
A proper cricket kit bag is useful because cricket equipment is bulky.
Look for enough room for:
- Bat
- Helmet
- Gloves
- Pads
- Shoes
- Clothing
- Protective equipment
- Water bottle
- Small accessories
A bag with separate compartments can make life much easier.
You don’t want to empty your entire kit bag onto the ground just to find your batting gloves.
13. Do You Need a Batting Inner?
Batting inners aren’t essential, but they’re useful.
They sit underneath your batting gloves and can help manage sweat while improving comfort.
They’re especially helpful during hot weather or long training sessions.
Keep an extra pair in your kit if you play regularly.
14. Check the Cricket Bat Before Buying
Don’t simply look at the sticker price.
Before buying a cricket bat, check:
- Bat size
- Bat weight
- Handle type
- Overall condition
- Grip condition
- Toe condition
- Any visible cracks
- Manufacturer specifications
- Whether it is suitable for your playing level
If you’re buying a new bat, check the manufacturer’s recommendations for preparation and use.
If you’re buying a used bat, inspect it carefully.
Small cosmetic marks aren’t necessarily a problem, but significant cracks, damage around the toe, or structural issues deserve caution.
15. Check Your Gear Before Every Match
Your cricket kit shouldn’t only be checked when you buy it.
Make a quick inspection before every game.
Bat
Check for:
- Cracks
- Loose grip
- Damage around the toe
- Loose stickers or other signs of damage
Gloves
Check for:
- Damaged padding
- Torn material
- Loose stitching
- Poor fit
Pads
Check for:
- Broken straps
- Damaged padding
- Loose sections
- Poor fit
Helmet
Check for:
- Cracks or damage
- Loose components
- Damaged grille
- Problems with the chin strap
Shoes
Check for:
- Worn-out soles
- Damaged spikes if applicable
- Loose parts
- Poor grip
If protective equipment is damaged, don’t assume it’s still safe just because you can technically wear it.
16. Complete Beginner Cricket Kit Checklist
If you want a simple shopping list, use this.
Essential Equipment
Useful Additions
Only If You Are Wicketkeeping
17. Beginner Cricket Kit: What Should You Buy First?
If your budget is limited, don’t try to buy everything at once.
Start with the equipment you actually need to participate safely.
| Priority | Equipment | Why |
|---|---|---|
| 1 | Bat | Your main playing equipment |
| 2 | Helmet | Important head protection |
| 3 | Batting gloves | Protects your hands |
| 4 | Batting pads | Protects your legs |
| 5 | Abdominal protector | Important personal protection |
| 6 | Cricket shoes | Grip and movement |
| 7 | Kit bag | Storage and transport |
| 8 | Thigh guard | Extra protection |
| 9 | Arm/chest guard | Additional protection |
| 10 | Accessories | Useful but not urgent |
This approach helps you avoid spending money on equipment that won’t improve your actual playing experience.
18. New Cricket Players: Common Buying Mistakes
Buying a Bat Based Only on Price
An expensive bat isn’t automatically the right bat for you.
A cheaper bat that fits your size and strength can be much easier to learn with.
Choosing a Bat That’s Too Heavy
This is especially common among young players.
Don’t buy a heavier bat because you think it will automatically hit the ball farther.
Control comes first.
Ignoring Height When Choosing a Junior Bat
Age is useful, but height is often the better starting point.
Use both when comparing junior bat sizes.
Buying Shoes Without Checking the Surface
Spikes aren’t appropriate for every pitch.
Find out where you’ll actually play before purchasing your cricket shoes.
Buying a Helmet Without Trying It On
Helmet fit matters.
If possible, try it on before buying.
Buying Everything in One Go
You don’t need a professional-level equipment collection on your first day.
Start with the essentials and upgrade as you gain experience.
Forgetting League Rules
Some competitions have specific requirements for helmets, clothing, footwear, or other equipment.
Check the rules before buying specialized gear.
19. New vs Used Cricket Equipment
Used equipment can be a great way to save money, particularly when you’re buying gear for a child who may outgrow it quickly.
But not everything should automatically be bought second-hand.
Used Equipment Can Make Sense For:
- Cricket bats in good condition
- Kit bags
- Some clothing
- Training equipment
Be More Careful With Used:
- Helmets
- Protective equipment
- Damaged gloves
- Worn-out pads
With safety equipment, you need to know its history and condition.
If you don’t know whether a helmet has experienced a significant impact, buying new is the safer choice.
20. How to Test Your Cricket Gear Before Buying
If you’re shopping in person, don’t just stand there and look at the equipment.
Actually try it.
Test Your Bat
Hold it in your normal stance.
Ask yourself:
- Can I lift it comfortably?
- Can I move it quickly?
- Does the handle feel comfortable?
- Can I control it with both hands?
Test Your Gloves
Grip a bat.
Open and close your hands.
Make sure your fingers aren’t cramped.
Test Your Pads
Walk around.
Bend your knees.
Get into a batting stance.
The pads should stay in position.
Test Your Helmet
Move your head from side to side.
Look up and down.
The helmet shouldn’t shift excessively.
Test Your Shoes
Walk and make a few quick movements.
Make sure your heel doesn’t slip inside the shoe and that your feet feel secure.
21. A Simple Cricket Gear Checklist by Player Type
Not every beginner needs the same equipment.
| Player Type | Basic Gear |
|---|---|
| Beginner batter | Bat, gloves, pads, helmet, protection, shoes |
| Beginner bowler | Shoes, appropriate clothing, protection when batting |
| All-rounder | Batting gear + bowling footwear/equipment |
| Wicketkeeper | Batting gear + wicketkeeping gloves and pads |
| Junior player | Correct-size bat, helmet, gloves, pads, shoes, protection |
| Casual player | Basic bat, gloves, pads, helmet, suitable footwear |
If you’re an all-rounder, you don’t need a completely different kit.
You’ll mostly need the appropriate equipment for batting, bowling, and fielding.
22. What to Verify Before You Buy
Before clicking Buy Now, run through this checklist.
Size
Is the equipment appropriate for your height, age, and body size?
Fit
Have you checked the manufacturer’s sizing chart?
Weight
Can you comfortably control the bat?
Surface
Are your cricket shoes suitable for where you play?
Safety
Does the protective equipment provide the coverage you need?
Rules
Does your club or competition allow the equipment?
Condition
If buying used, is everything structurally sound?
Comfort
Can you actually move naturally while wearing it?
Return Policy
If you’re ordering online, can you return or exchange the item if the size doesn’t fit?
That final point is easy to overlook.
A product can technically be the correct size according to a chart and still feel wrong when you actually wear it.